Settings-OBS-Recording-Plugin
OBS Recording Configuration
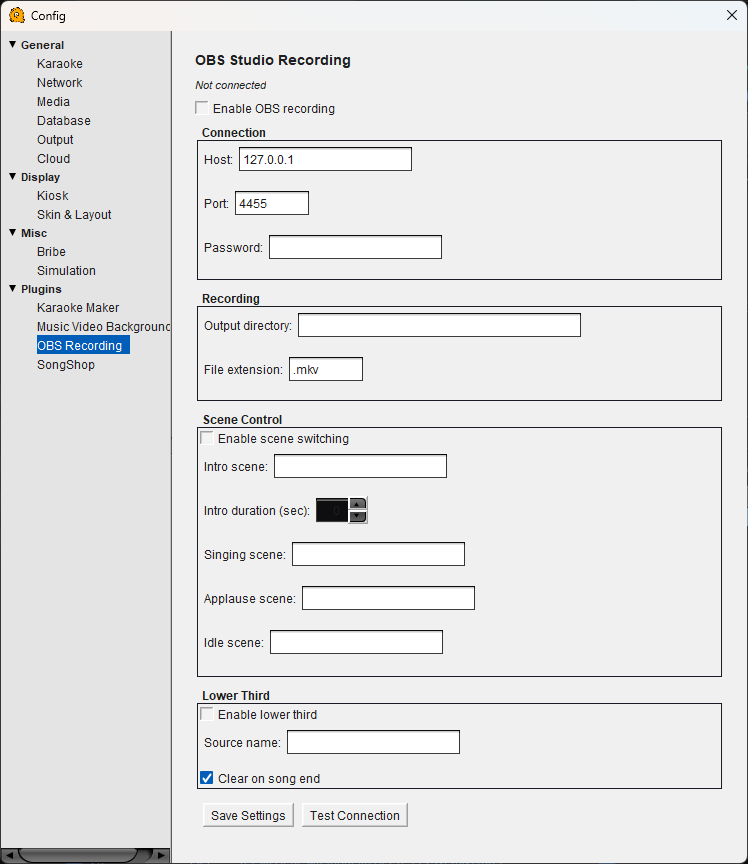
Integrates QUP with OBS Studio via WebSocket so each singer's performance is automatically recorded as a separate file. OBS must be running with the WebSocket server enabled.
The connection status is shown at the top of the panel ("Not connected" or "Connected").
Enable OBS recording — Turns automatic recording on or off. When enabled, QUP tells OBS to start recording when a karaoke song begins and stop when it ends.
Connection
Host — The IP address of the machine running OBS. Default is 127.0.0.1 (localhost) if OBS is on the same computer as QUP.
Port — The WebSocket port OBS is listening on. Default is 4455, which matches OBS's default WebSocket server port.
Password — The WebSocket password configured in OBS. Leave blank if you have not set a password in OBS's WebSocket settings.
Recording
Output directory — The folder where OBS saves recorded performance files. Set this to match or override your OBS recording output path.
File extension — The file format for recordings. Default is .mkv. MKV is recommended because it is resilient to crashes — if OBS or QUP stops unexpectedly, the file is still playable. You can remux to MP4 later from within OBS.
Scene Control
QUP can automatically switch OBS scenes at different points during a performance, giving your stream or recording a polished, professional look.
Enable scene switching — Turns automatic scene switching on or off.
Intro scene — The OBS scene to switch to when a singer is announced and the song is about to start.
Intro duration (sec) — How long the intro scene is displayed before switching to the singing scene.
Singing scene — The OBS scene to display while the singer is performing.
Applause scene — The OBS scene to switch to when the song ends. Use this to show a "great job" graphic or an applause animation.
Idle scene — The OBS scene to display between performances when no one is singing. This could be your venue branding, upcoming singer list, or a filler screen.
Lower Third
Displays the current singer's name and song title as a lower-third overlay in OBS — the text banner typically shown at the bottom of a video feed.
Enable lower third — Turns the lower third overlay on or off.
Source name — The name of the OBS text source that QUP will update with the singer and song information. Create a text source in OBS and enter its exact name here.
Clear on song end — When enabled, the lower third text is cleared when the song finishes. Disable this if you want the text to remain visible during the applause scene.
Save Settings — Saves your OBS recording configuration.
Test Connection — Attempts to connect to OBS using the current host, port, and password settings. Use this to verify OBS is reachable before going live.
Enabling WebSocket Server in OBS Studio
Before QUP can control OBS, you need to enable the WebSocket server inside OBS. OBS version 28 and later includes WebSocket support built in — no plugins required.
- Open OBS Studio.
- Go to Tools → WebSocket Server Settings.
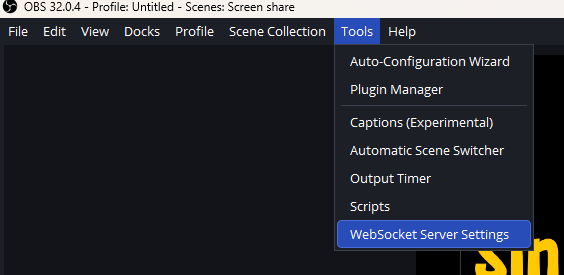
- Check Enable WebSocket Server.
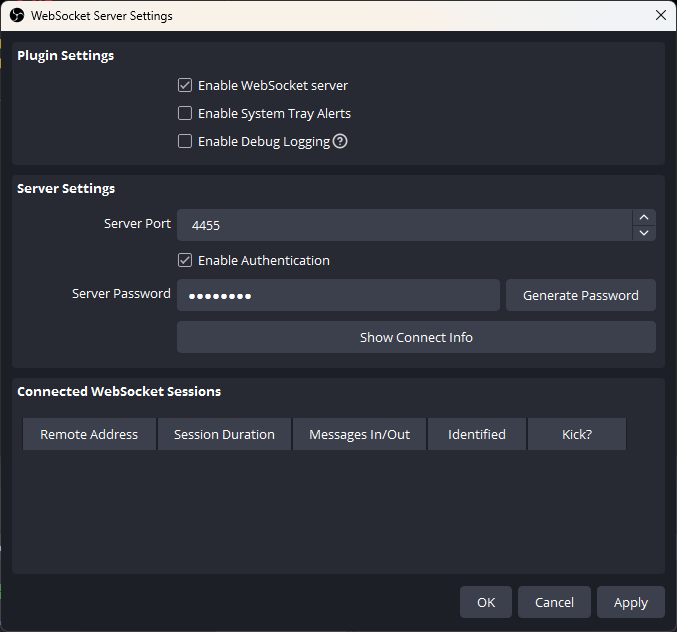
- The default port is 4455. Leave this as-is unless another application is using that port.
- If you want password protection, check Enable Authentication and set a password. Enter the same password in QUP's OBS Recording connection settings.
- Click Apply or OK.
If you are running OBS on a different computer than QUP, make sure the OBS machine's firewall allows incoming connections on the WebSocket port (default 4455). Enter that machine's IP address in QUP's Host field instead of 127.0.0.1.
If you are running OBS version 27 or earlier, you will need to install the obs-websocket plugin separately from the obs-websocket GitHub releases page. Version 28+ does not need this.
After enabling the WebSocket server in OBS, return to QUP and click Test Connection to verify everything is working.